Open Outlook and select File > Add Account.
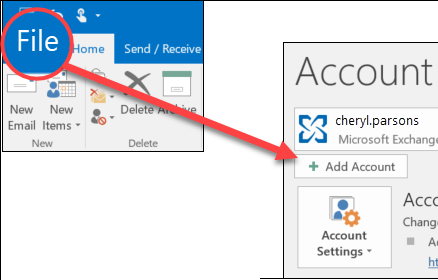
Note: Outlook 2007 users should select Tools > Account Settings. On the Email tab, select New.
-
For Outlook 2016, enter your email address, then select Connect.
For Outlook 2013 and Outlook 2010, select Email Account and then enter your name, email address, and password. Then select Next. -
If prompted, enter your password again, then select OK, and Finish to start using Outlook.
Note: You can use these steps to add your first account to Outlook or additional accounts.
Update your email settings in Outlook for PC
Sometimes you need to make a change to your email account settings. If you have a new password, if your email provider has asked you to change settings, or if you're having problems with sending and receiving email, you can change your email account settings in a few steps.
-
Open Outlook and select File > Account Settings > Account Settings.
-
Select the email account you want to change, then select Change.
-
On the settings page, you can update your incoming and outgoing server names, your email address, your name, your user name, and your password. If you need to change your SSL settings or your port settings, select More Settings.
-
The most common settings to update are on the Outgoing Server tab and the Advanced tab.
-
If you're having problems sending email or are receiving messages about your outgoing server, make sure the box for My outgoing server (SMTP) requires authentication is checked.
-
If you need to update your incoming or outgoing server ports or SSL settings, use the Advanced tab.
Note: For AOL and Verizon customers: selecting SSL/TLS from the drop-down boxes under incoming and outgoing server encrypted connections will ensure you can still send and receive email after November 7, 2017.
-
-
When you're done updating your settings, select OK > Next > Finish.
Use Advanced Setup to add POP or IMAP email account in Outlook for PC
If you need to enter specific values for incoming and outgoing server names, port numbers, or SSL settings, you can use Outlook's advanced setup option. You can use these instructions to add a POP or IMAP account to Outlook.
-
Open Outlook and select File > Add Account.
-
On the next screen, enter your email address, select Advanced options, then check the box for Let me set up my account manually and select Connect.
-
Select your account type. Most of the time when you need to use this option, you'll select IMAP.
-
The Account settings screen should be pre-populated with most of the account settings you need. However, if you need to look up your settings, see the POP and IMAP account settings topic. Enter your incoming and outgoing server settings and then select Next.
-
Enter your password and then select Connect.
Set up two-factor authentication for Gmail
-
Go to Gmail from your browser, then select the Google apps icon in the upper right corner of the screen.

-
Select My Account. Under Sign-in & security, select Signing in to Google.
-
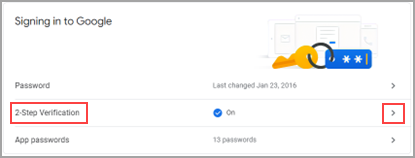
Under Password & sign-in method, if 2-Step Verification is ON, skip to the next step. Otherwise, select 2-Step Verification and follow the prompts. When you're done, select the back arrow at the top of the screen.

-
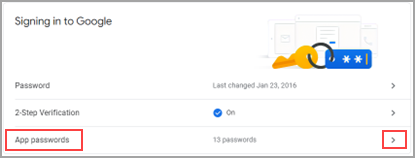
Under Password & sign-in method, select App passwords.
-
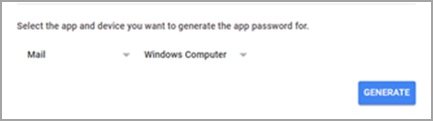
Enter your Google password and then select Sign in. At the bottom of the next screen, select Mail and Windows Computer from the drop-down lists, then select Generate.
-
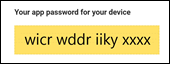
Google will display an app password for you. Make a note of this password (without the spaces) and use this as the password when adding a new account to Outlook.